

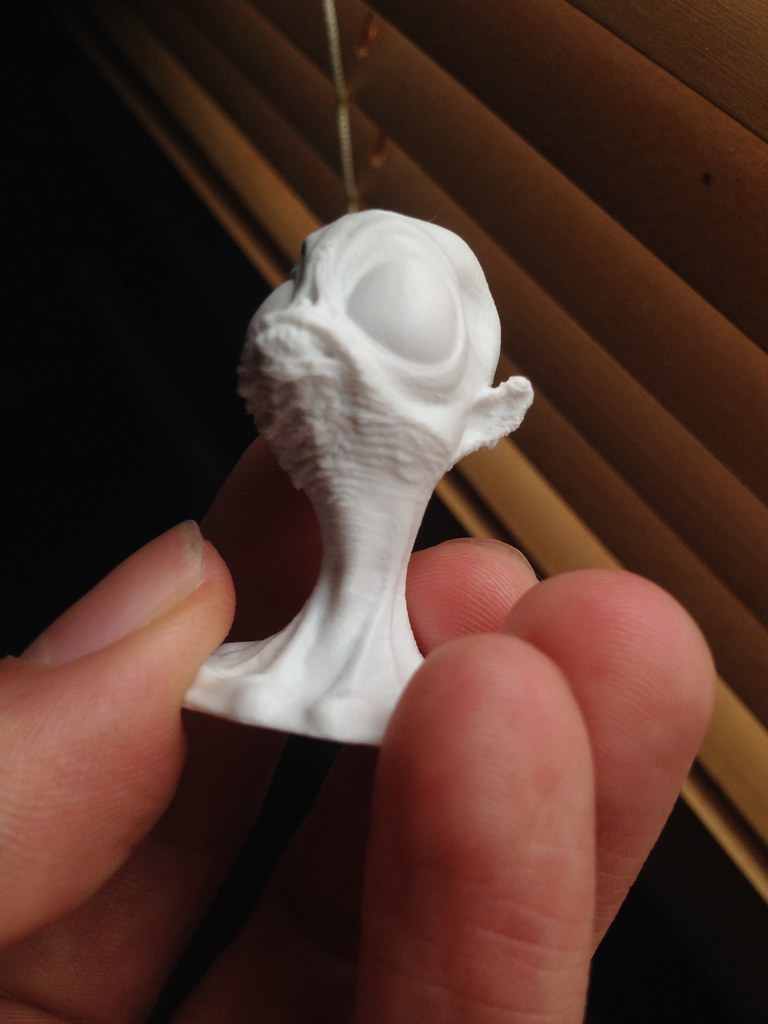
My latest print, I got some airbrush's and a compressor for my b-day so i am now going to try and paint some of my prints.... so this is my first test subject....


My latest print, I got some airbrush's and a compressor for my b-day so i am now going to try and paint some of my prints.... so this is my first test subject....
My latest print, I got some airbrush's and a compressor for my b-day so i am now going to try and paint some of my prints.... so this is my first test subject....
Looks great! what paint are you using? that metalic paint seems more reflective than most.
Cor3ys, I'm impressed by the quality of the surface, too. Nice coating. It comes close to the version by Adam Savage, and that one has real chromium coating. (I didn't know, that it is possible to chrome plastic until this video)
The video is a nice reference.
@cor3ys: Awesome work man!
I was going to suggest going over it with some black paint but the video above saves the explanation, just watch that instead.
"Tested" is a pretty sweet channel over at youtube for those that don't know. Adam Savage makes regular appearances and even Jamie sticks his head in from time to time.
"...material is a lot rougher on the over hangs and noisy areas but it does seem to have a very slightly smoother surface in areas of low noise."
Hi Leo,
This topic is growing so fast I can't keep up  I saw from the pictures you posted a few pages back you had some issues with overhangs. My best guess would be your printing the overhangs to fast so they don't have enough time to cool, you should be able to see this during print, the layer will curl upwards towards the nozzle.
Instead of slowing down the entire print, which is an option, you could also increase the minimal layer time. The default setting is 5s, you could increase this to about 8s. Especially on small prints with overhangs this will make a difference in quality.
Like your work, looks very cool and bit creapy 
cheers,
Gijs
Cor3ys, whoa man I didnt know you was working on a terminator. You, Braddock and I need to meet up for a beer soon, bring all out T800 parts and we should make a full terminator lol.
Conz, great video link. Loved seeing the T800 arm, reminded me of my one which I should finish haha.
The plating process which they refer to is standard " electro plating ". There is a series of dip baths, first copper, then nickel then the chromium plating on last. Dip bathing used to be done by hand ( still is in lots of places ) but big factories are all mechanised dipping booths now.
ABS, which our lovely printers can print, is a great plastic for electroplating!!
speaking of which... almost finished modeling the first pate. The face plate. I'm rebuilding a scan from an actual endoskull. The scan isn't great, a lot of lost detail, so cross referencing with a Vinyl recast endoskull I have on my desk.
I wont be modeling / printing teeth. This will be 1:1 so intend to use acrylic false teeth.

Looking awesome so far, looking forward to the final product. I hope you haven't changed your mind on sharing it
I'll share it only if people promise not to print it at anything less than 0.06mm
Looking awesome so far, looking forward to the final product. I hope you haven't changed your mind on sharing it
Great, then I'll print it at 0.2 since that's more than 0.06 (sorry, couldn't resist  )
)
Maybe I'll only release GCode

Hi all,
Yesterday i finally upgraded the firmware of my UM2 and i couldn't resist playing with the new pause function

I don't know if this is recommended but this is what i did:
I do think that this is easier (maybe only possible) with Robert's great feeder design.
Pause the print
Reduce the hotend temp to 90°c
Release the pressure in the feeder with the clip
Pull out the filament by hand
Push the other filament by hand until it stops
Put temp back to 210°c
Push filament by hand to extrude a bit
Reclip the feeder to make it work again
Resume print
I've wanted to try this for a couple of weeks just for fun
Next new attempt at the UM Robot, it's now near to perfect i think


Last, first attempts to braddock's awesome design
Layer height of 0.08 i think
Had to abort the print before it finished because of a thunder storm approaching :mrgreen:


Mostly ok except for this:

I will start a separate thread for this issue
Well nothing as awesome as those T800 heads (because my modeling skills just suck so far).
More RC boat stuff: just a simple wheelhouse for my springer towboat.
The real deal looks like this, super easy to model:

Truckable tug
My model in SketchUp (still haven't tried Autodesk Fusion 360!):

Wheelhouse 3D model

Wheelhouse 3D model
First print failed due to a clogged nozzle. And I'm still not in the clear ...
For the second print attempt I decided to try meshmixer's support generator instead of Cura (Cura's scaffolding works quite great but is also heavy handed)

Meshmixer-generated support
My nozzle is probably still partially clogged or has some left over gunk because filament tends to curl like crazy.
Some of the support failed to print yet the support that managed to get printed did the job and just snapped off clean. Quite impressed with meshmixer (though I still struggle with its UI).
Anyway, that's what I got after 23 hours (wheelhouse, door, bridge) + 6 hours (roof, navlight brackets). Might have been able to print everything at once but I still had some work to do on the roof.
Roof just fits snugly in the wheelhouse. Won't have to glue it in place so that I can reach the inside of the wheelhouse for "maintenance"

Front view

Working hinges

Rear view

All the parts
Now I need to clean up the nozzle real good to get the printer working 100% before I move to ABS ...
@ braddock. That looks ace!! If you need any help with the modelling let me know, although I am on Creo. Cant wait to see some of this.
@Didier. Oh thanks for the reminder on the Pause button. I have a bad habbit of playing with prints whilst its still printing lol, pause will help me fiddle easier
@Calimero. Really coming along nicely. That`s going to be an awesome model.
i love this tread so much.. so many amazing new designs and creations and what I find totally brilliant is.. users are sitting down using different software and creating their own projects and not just downloading stuff off the net and clicking print..
I know its not the first time I have complimented on this treat but i have to... :-)
Ian :-)
I knooooow. One of my most favorite threads.
All the creativity is so inspiring!
And the overal quality / expertise is sky-rocketing!!! :eek:
@Didier: Nice prints. I had the same problem with the Ieyo model.
I fixed it though by reducing the speed from 30mm/sec to 20mm/sec and turning up the minimum layer cool time to 10 seconds. I also lowered the temperature to 190. Its now printing and looks much better. I will post some pics soon.
@Calimero: Nice model and the print looks nice and clean.
@braddock: So excited to see the finished piece.
Another job for an office furniture factory... The most challenging job so far! 

That looks great! It's so very clean looking.
The scale is kinda wonkey though, it looks tiny because of the DOF, but the print lines seem quite fine.
Tilt shift?
Wow! The mesh must have been crazy to print
Stunning print Oswaldo !

ArunC posted a topic in UltiMaker Cura,

.thumb.jpeg.0b7a05eafc09add17b8338efde5852e9.jpeg)
Dustin posted a topic in Firmware,


Recommended Posts
Top Posters In This Topic
362
282
221
179
Popular Days
Jan 5
30
May 12
26
Jan 13
23
May 1
22
Top Posters In This Topic
ian 362 posts
cloakfiend 282 posts
skint 221 posts
SandervG 179 posts
Popular Days
Jan 5 2014
30 posts
May 12 2014
26 posts
Jan 13 2014
23 posts
May 1 2014
22 posts
Popular Posts
kmanstudios
Took me forever to do this. And it is still rougher than I would have liked. 3D concept rendering: Finished piece:
kmanstudios
I just finished this. It was a multi-part print for ease of painting. Some of it I am not sure what happened...but hey, it is purty....And, I am unanimous in that ? Test Render Parts
gr5
Bath interferometers. I have made about 20 of these for people who use them to test their telescope mirrors. They are amazingly accurate and can do better than a $40,000 Zygo PSI optical tester. Th
Posted Images
IRobertI 520
No wonder the images are huge, you're using PNG... If you were to save those as JPEGs instead (even at high quality) they'd be a tenth as heavy to load and you wouldn't be able to tell the difference visually. Something to consider for next time
Link to post
Share on other sites