


Holy s*** thats sexy

Oh, and the STLs are available on YM.... pom pom pom. Think I found my new project (after I get that baby mobile finished for my godchild) 

that's very impressive! a lot of work in that, each part correctly oriented too, looks great!
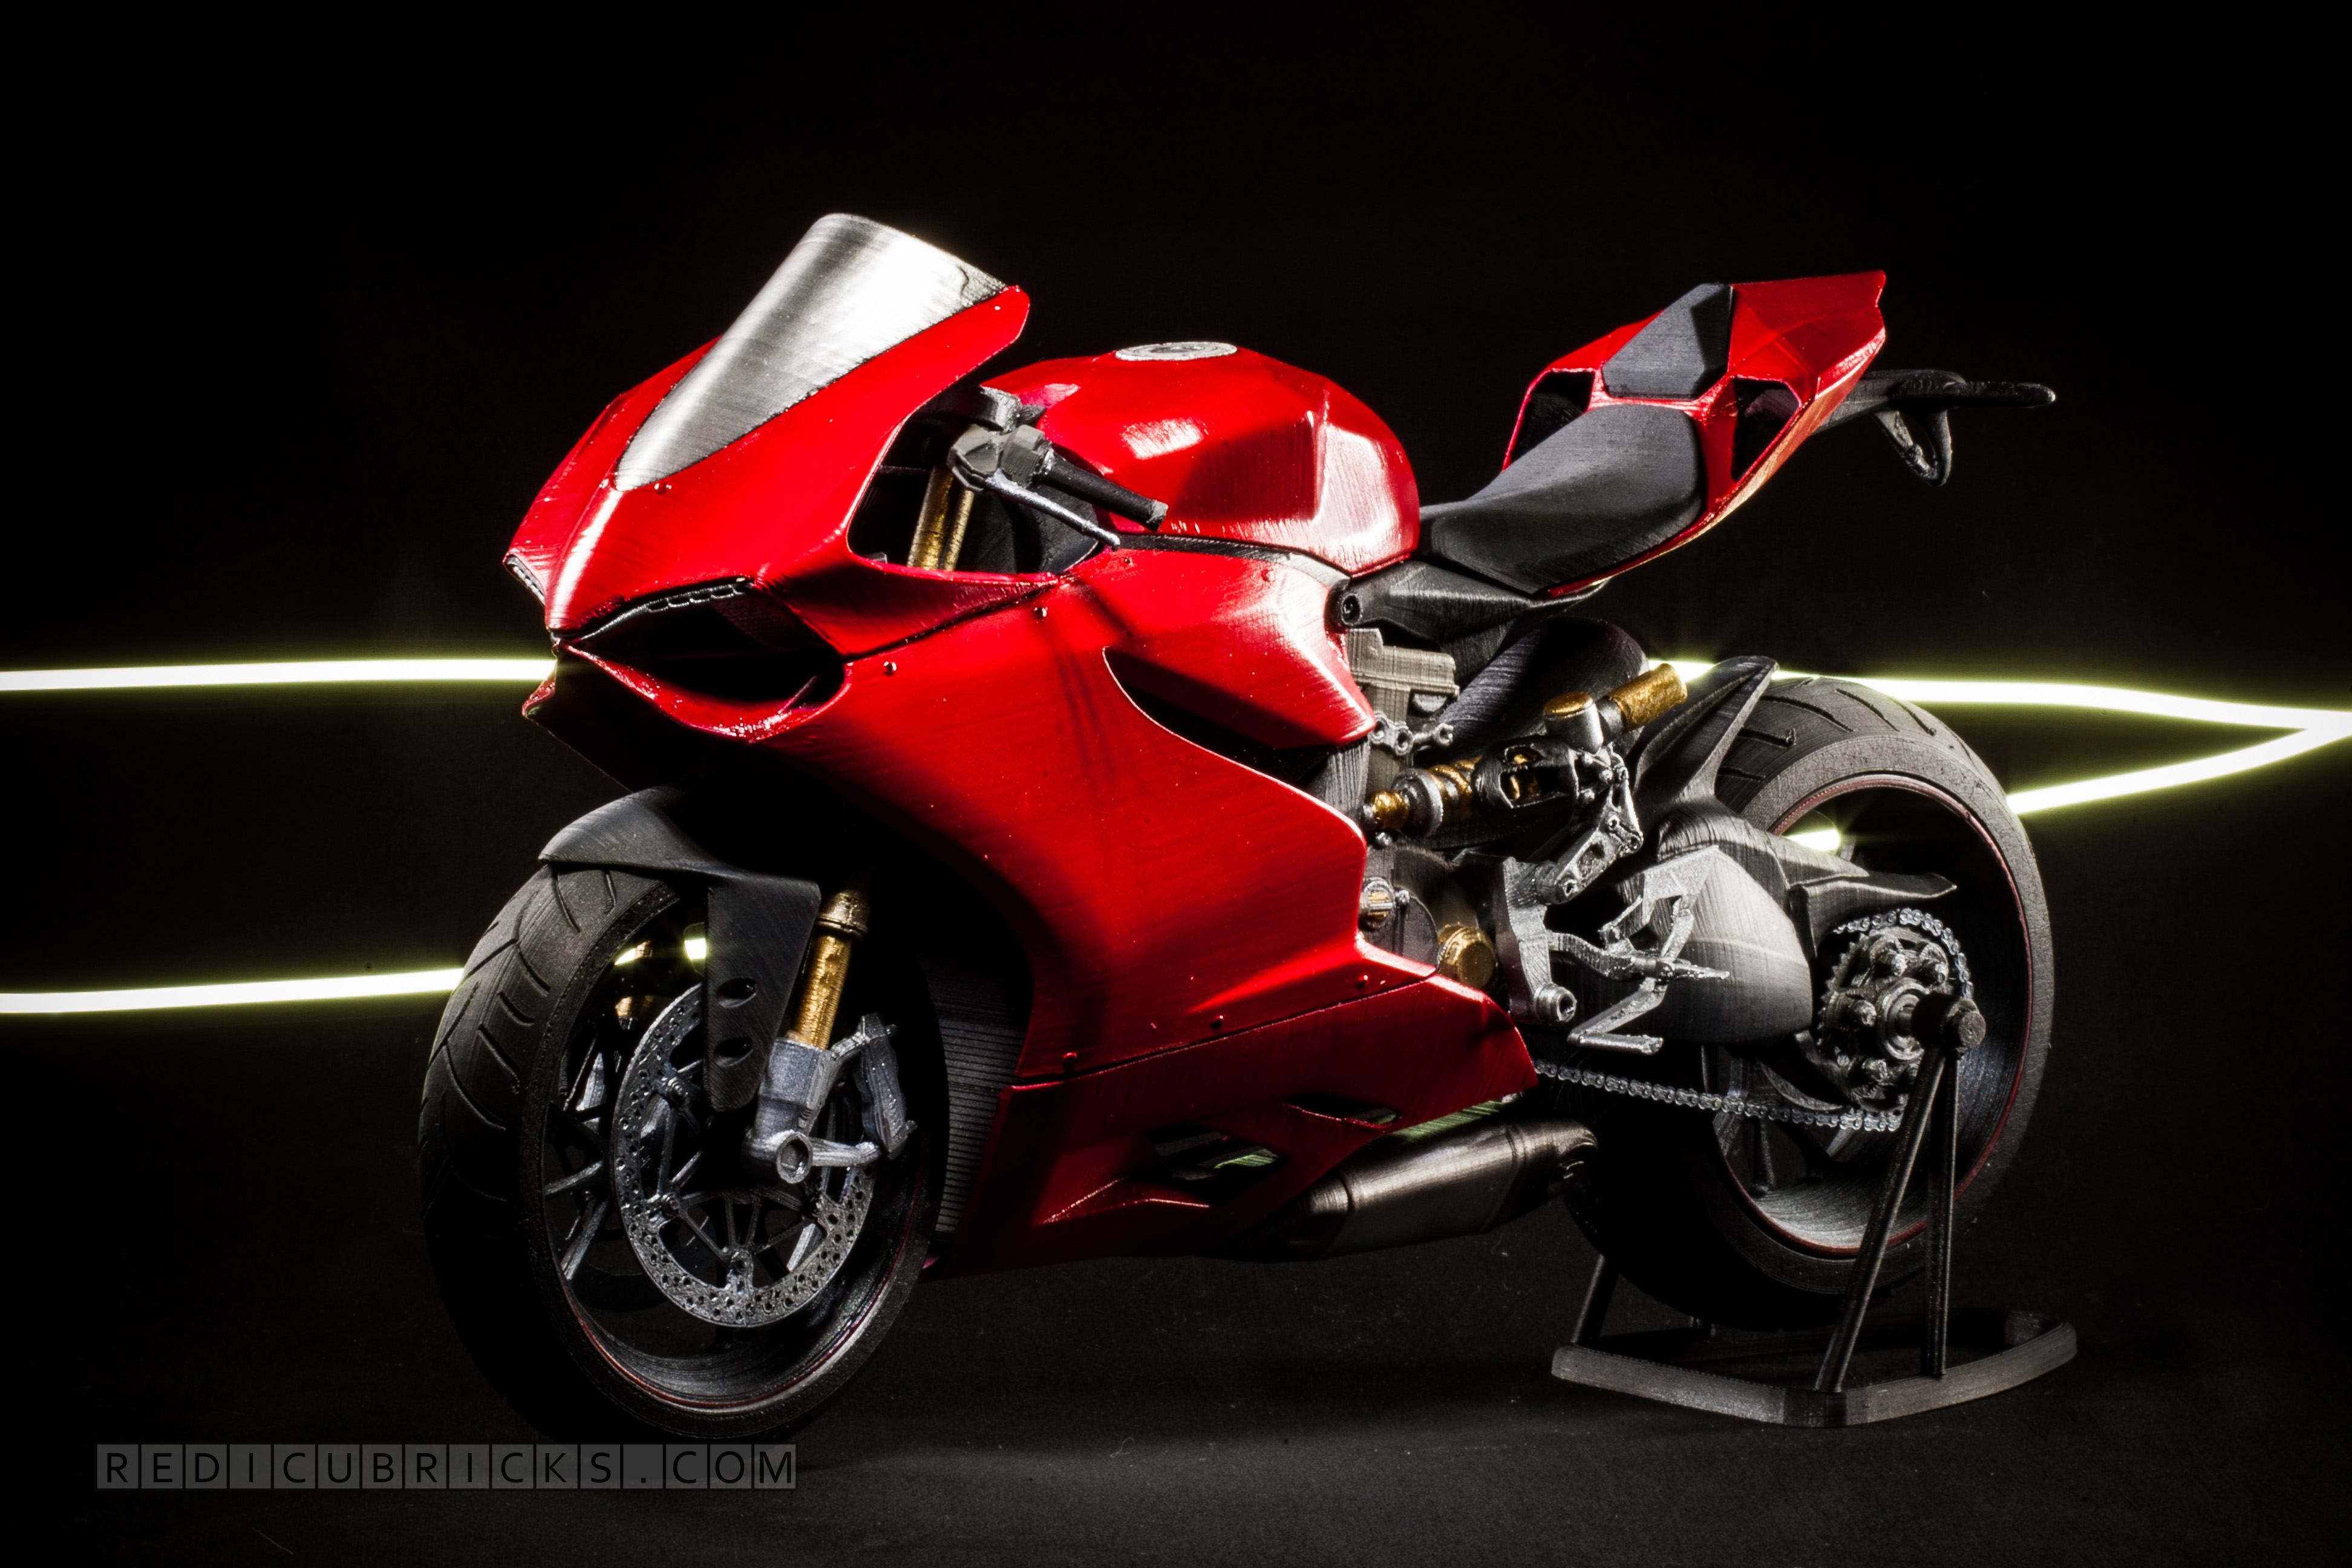
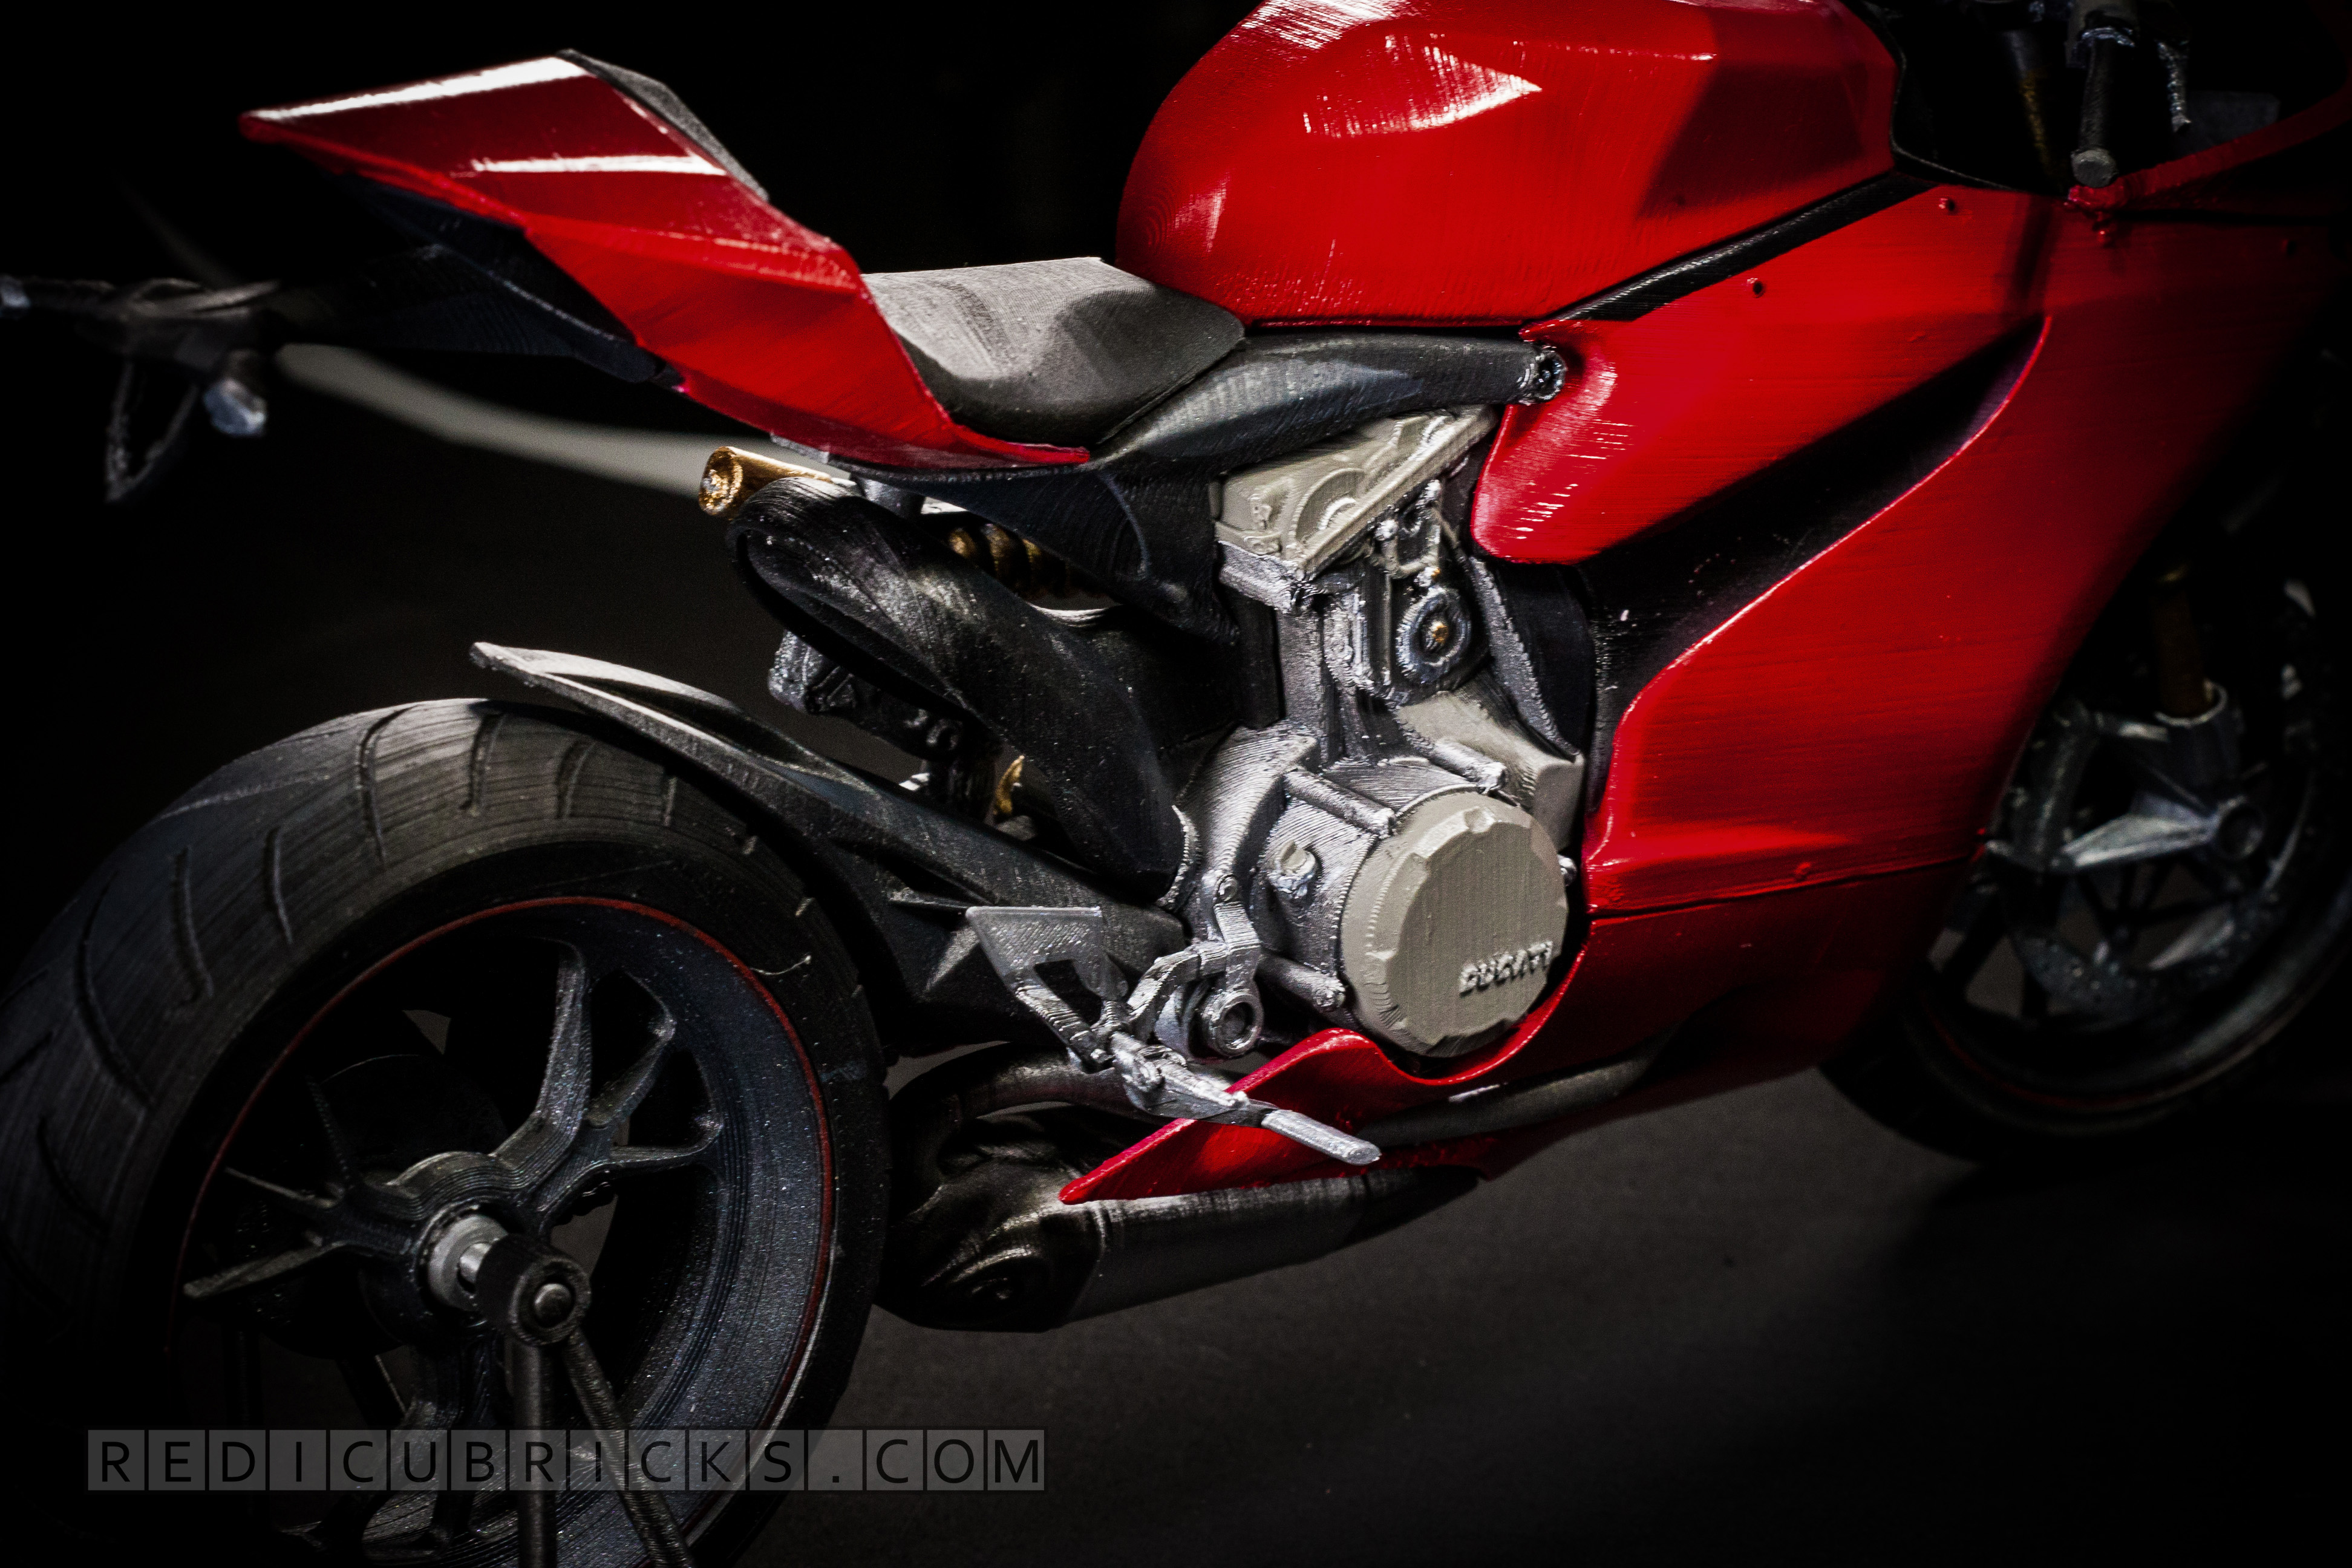
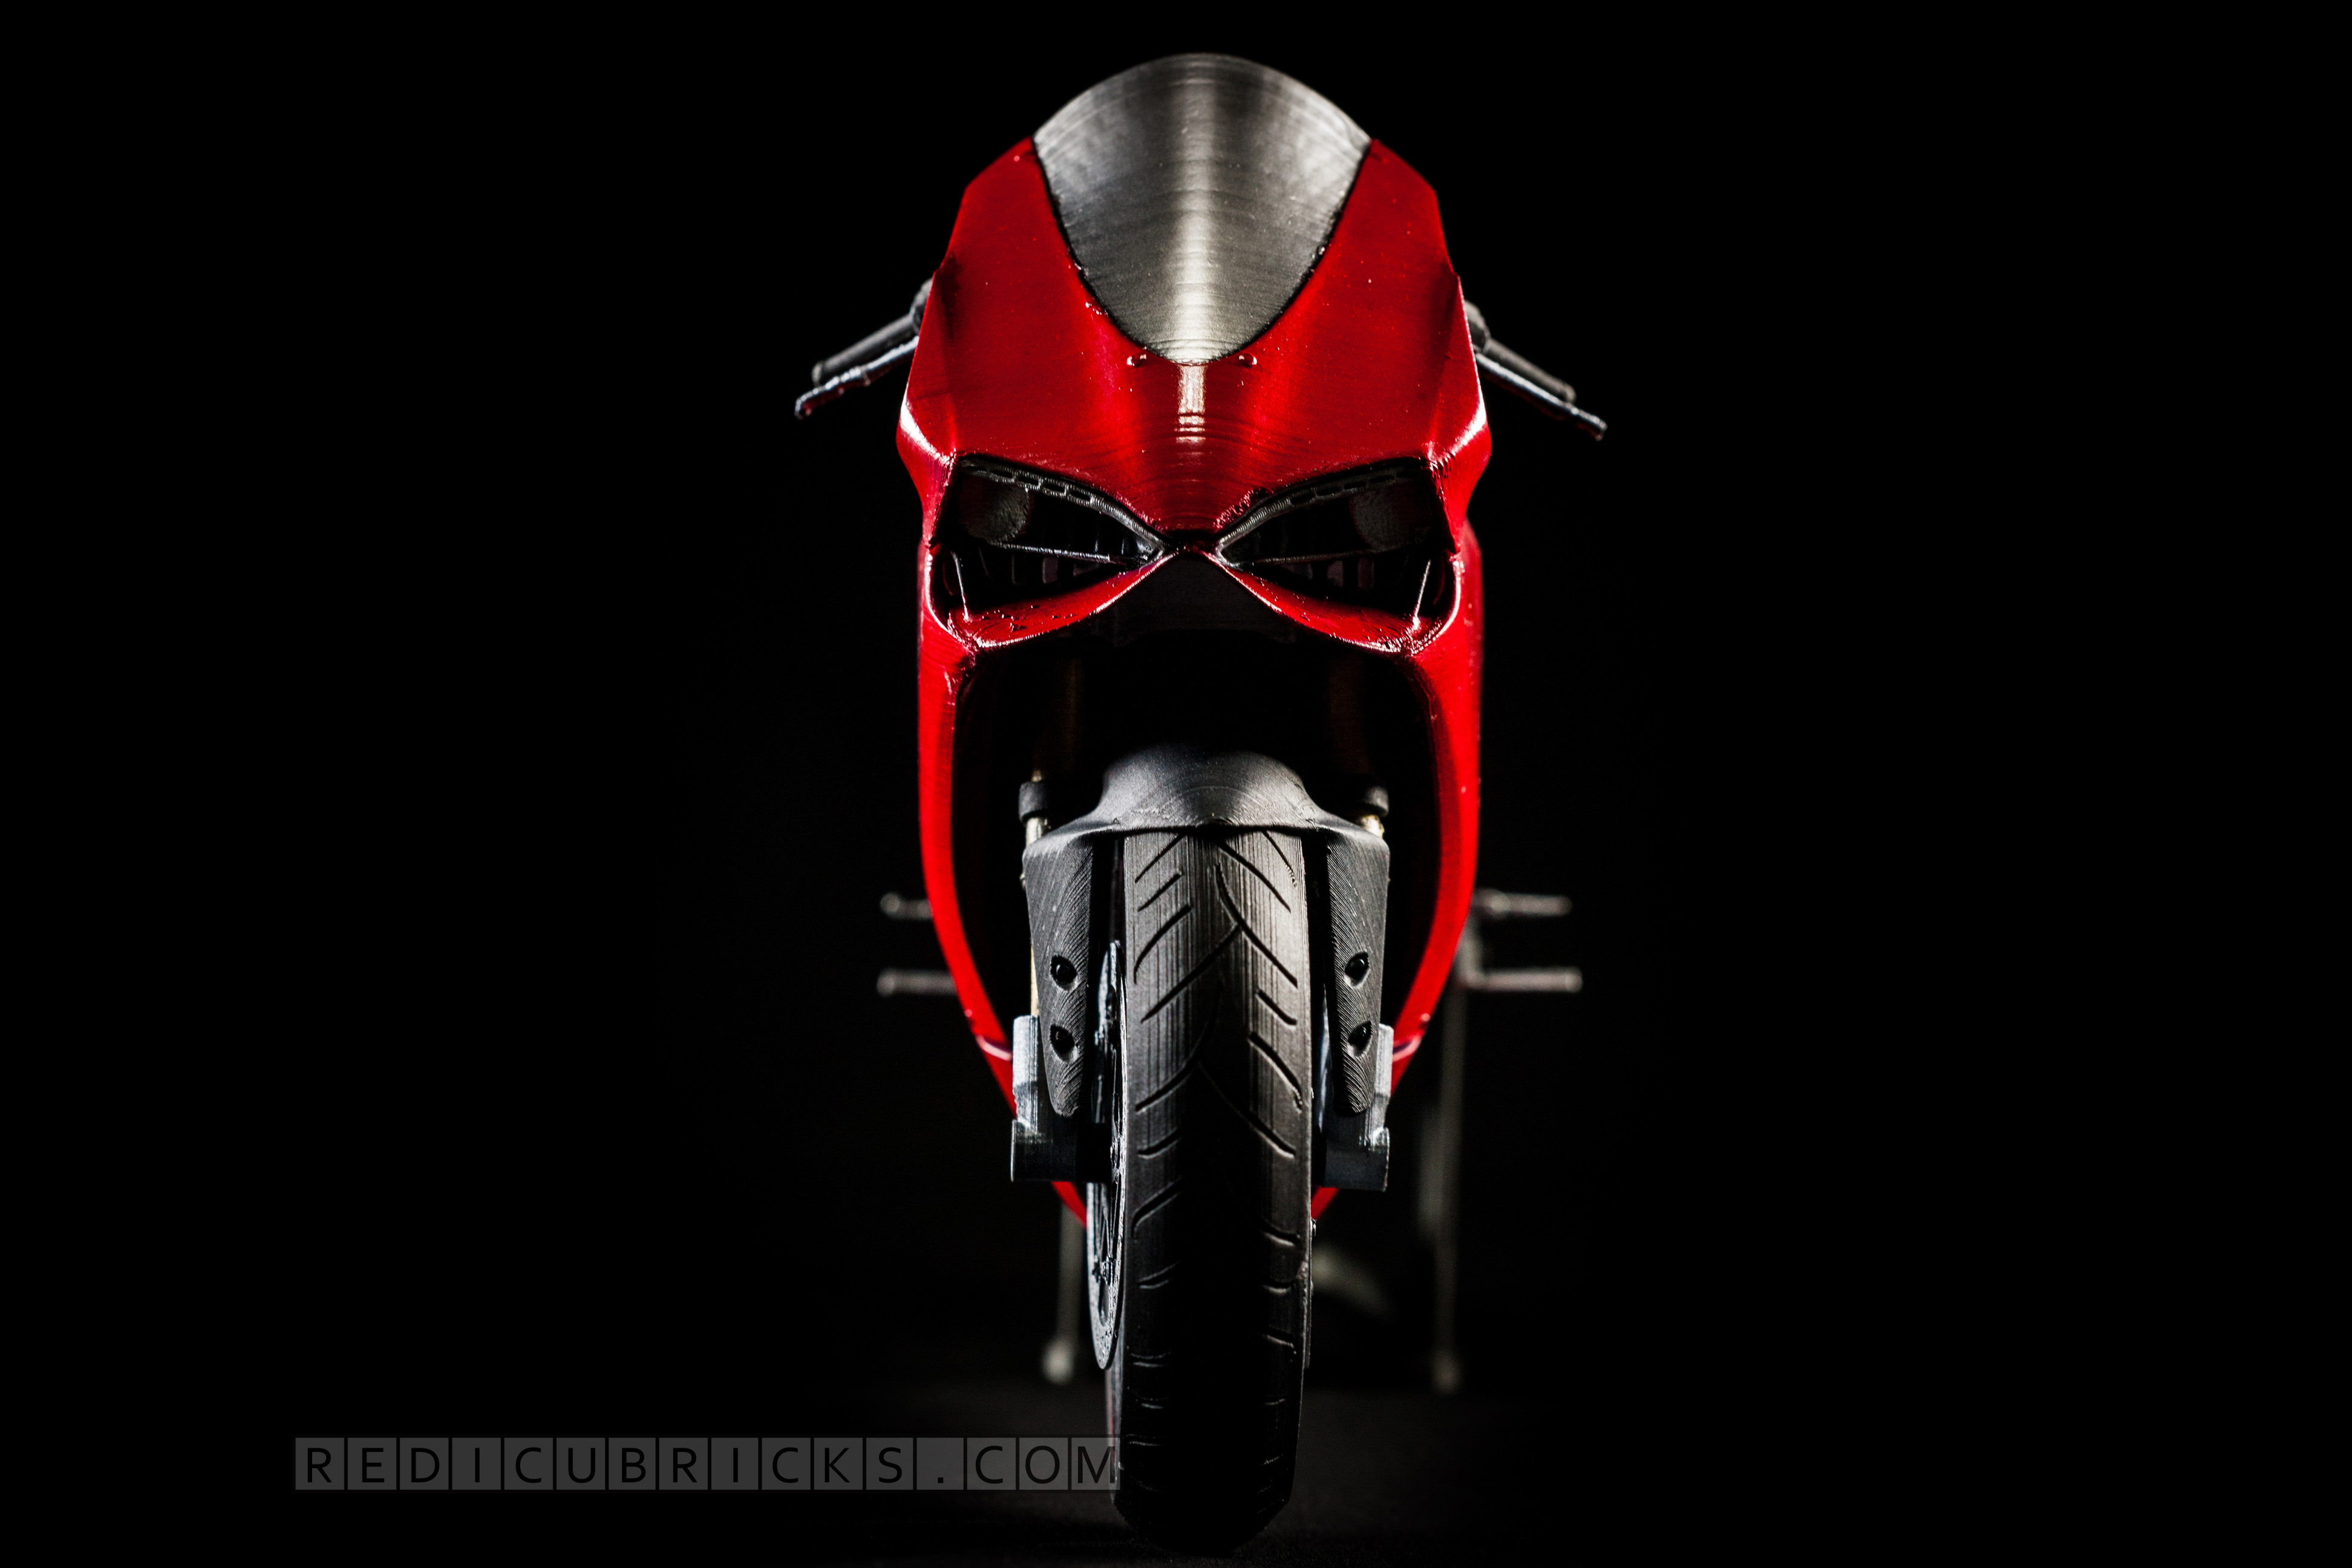
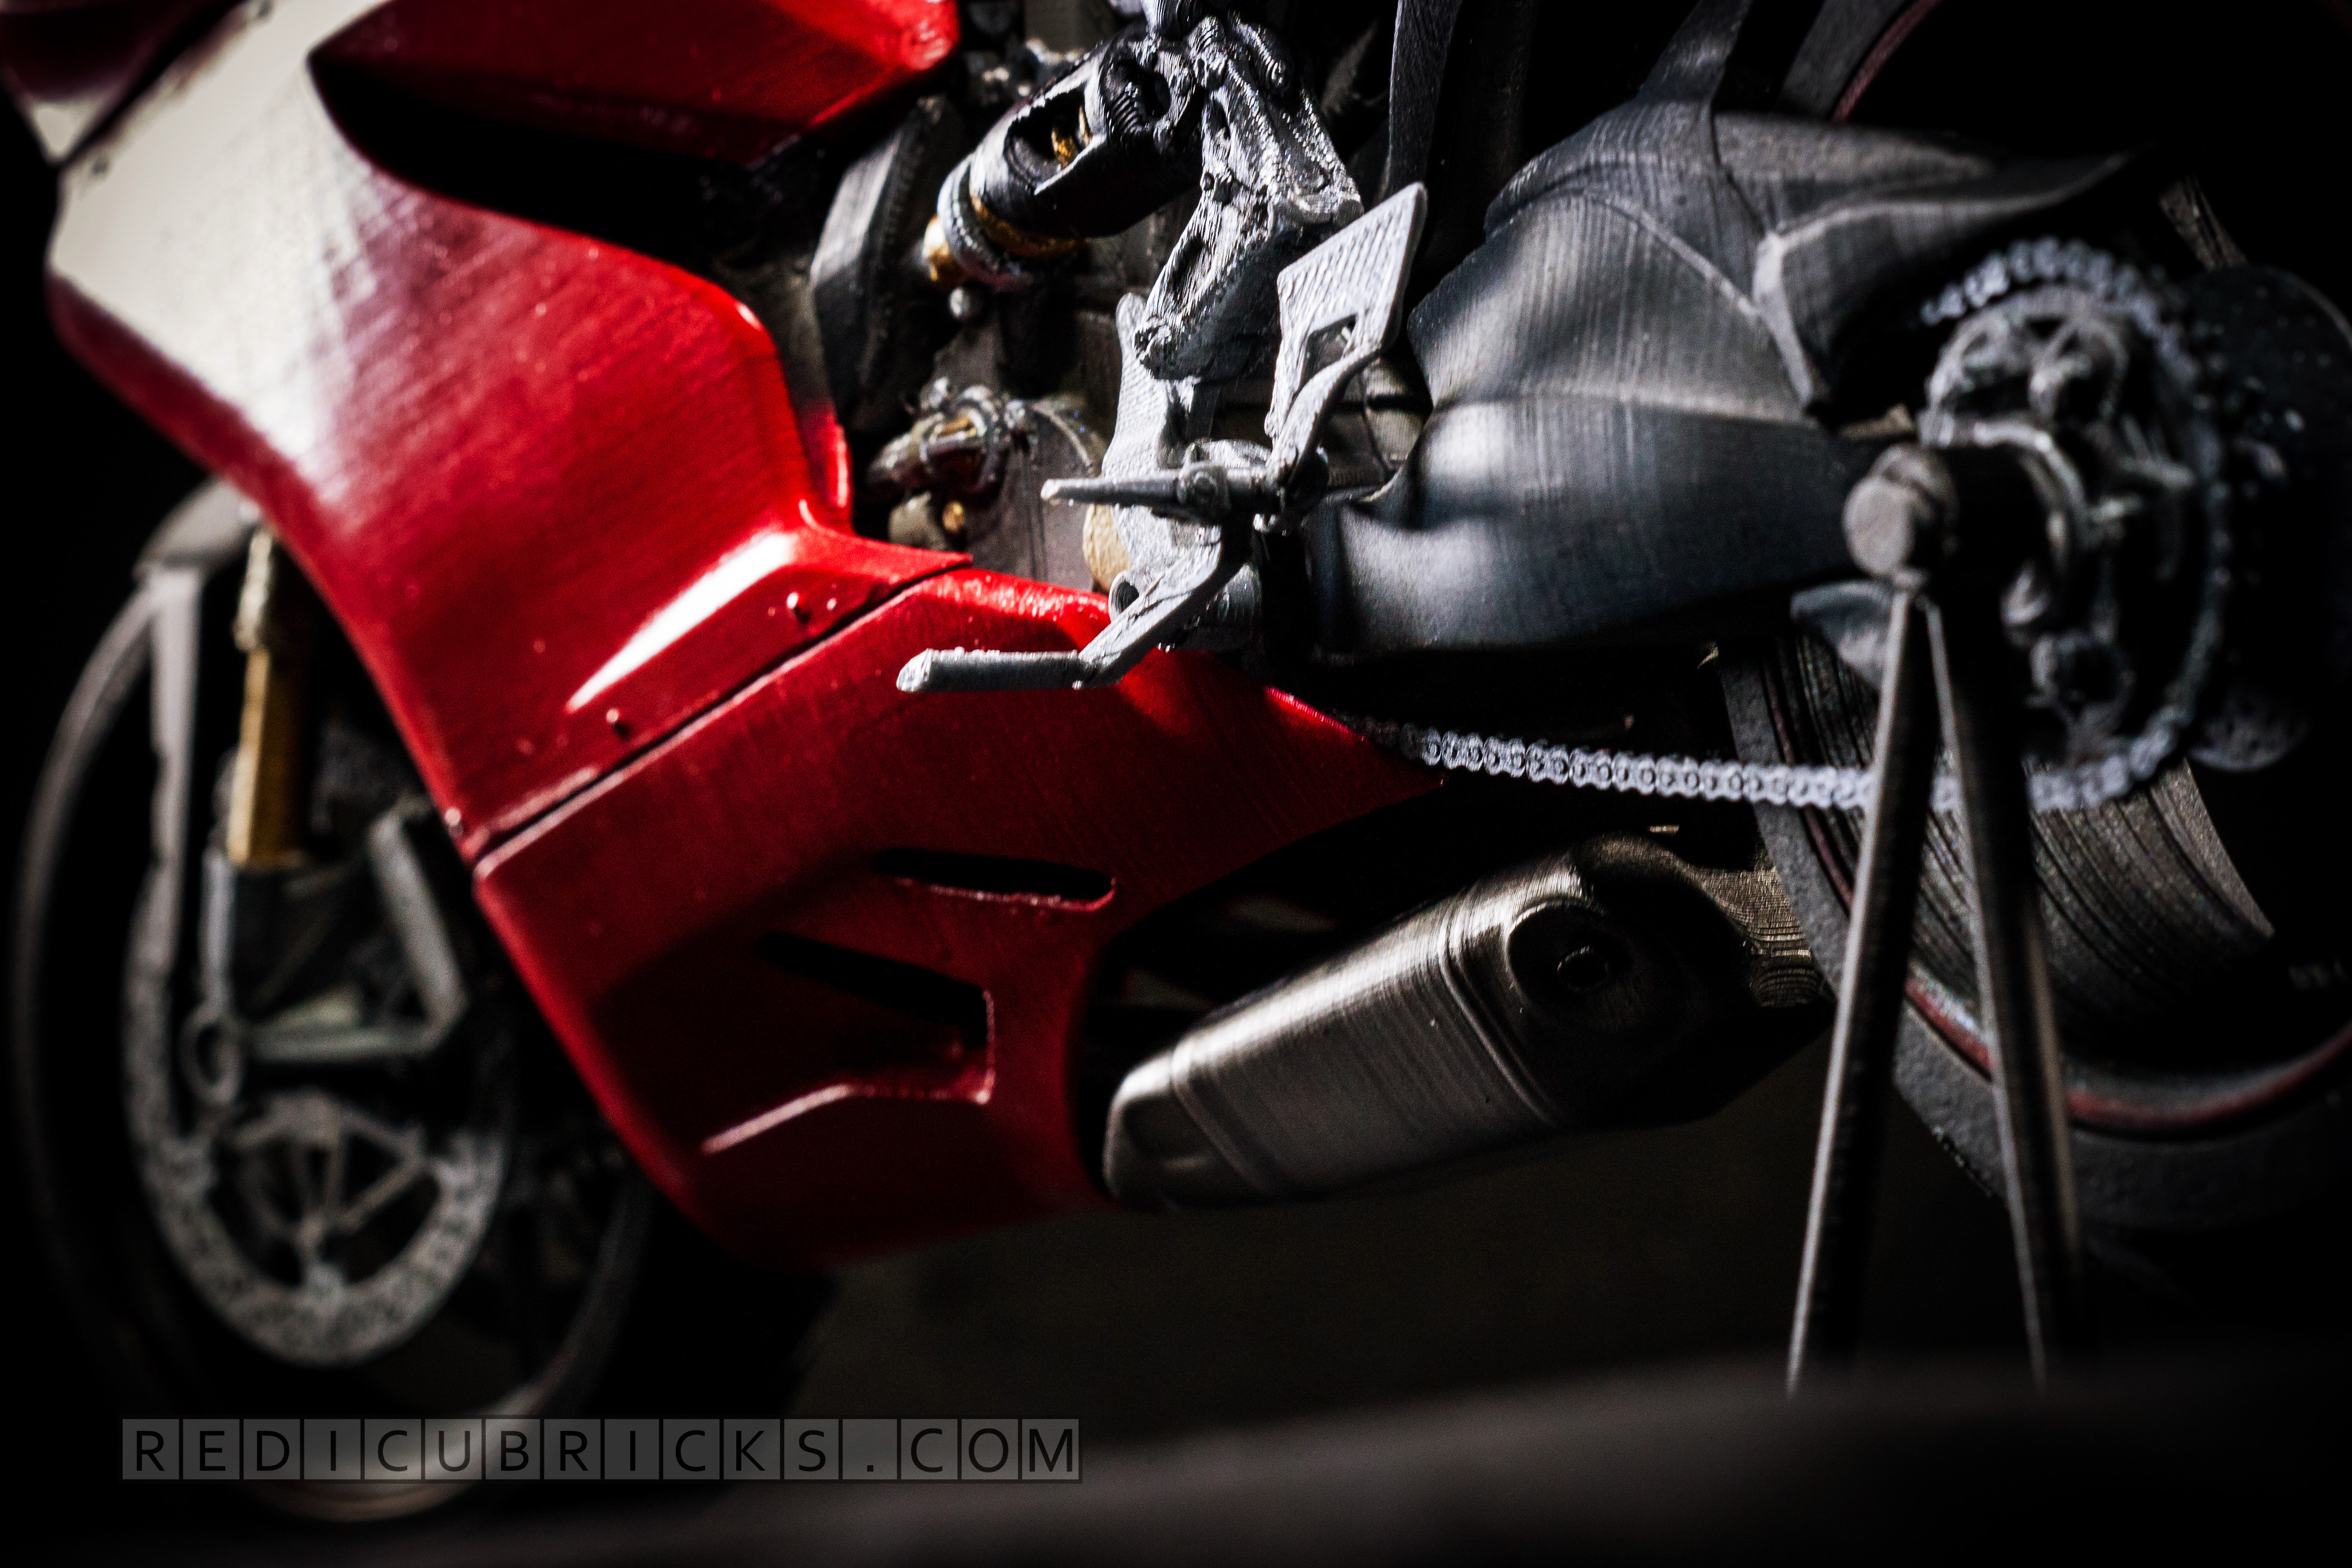
Sneak peak for my UM bros!
Printed on the UMO.
More pics.
http://www.redicubricks.com/3d-printed-ducati-1199-superbike-on-the-ultimaker/
And yes, model is shared on Youmagine.

DidierKlein 729
:eek: :eek: My god this is some sexy printing great job, i love the pics too. I went on your website and checked the pics... the first pics show the real one and the model one. Your pics are so nice that i got confused and thought the printed version was the real one :mrgreen:
And yes my Bronze T-800 needs a better finish, i have to get my hands on some proper polishing stuff, but i also like the less shiny effect it looks a bit like a rusty head you'll find in the garbage in a couple of years when machines have taken power in our world

Really insane project, this is going to be made in the winter by me!
Thank you Valcrow for sharing!


Wow! Thanks for sharing ( and thanks for giving the link before I could)!
I'd love to se the "manuals" for making the different shapes!
I had to adjust the thickness though:
for Colorfabb XT I only printed 2 layers of 0.4 mm. three is waaaay too tough.
for glowfill also 2 layers, but remember to put material flow to about 133% (on normal settings, I do not remember what normal flow is in mm/s), so the sheets are flexible enough.
They would indeed, with the new colored XT from ColorFabb they won't break as fast as PLA.......
See above, XT is too tough when too thick. Also use pritt/glue! XT tends to not stick to the glass buildplate ( at least on UM2)
Sneak peak for my UM bros!
More pics.
http://www.redicubricks.com/3d-printed-ducati-1199-superbike-on-the-ultimaker/
And yes, model is shared on Youmagine.
WOW! AMAAAAYZING ( crocodile)
How on earth...
how much time did it cost you?
Cheers!

Thanks guys! :mrgreen:
@braddock - Yeah the orientation (and combination) of everything was the toughest part. The tail section was particularly head scratching.. I ended up making it in 6 pieces all in weird angles, but it worked out in the end.
@Didier - That's the work of my bro the photographer. I'm not a fan of how the official Ducati bikes are lit, it's really weird and flat looking, almost fake like you said...
@cons - I fixed it! thanks!
@Lennart - It took me about 2.5 weeks (including painting), I had a bit of an insane 2.5 weeks since this was my side project. I had to make sure I was pretty much always printing even if the parts attached to it wasn't designed yet. Then foolish me, I went to try enamel and lacquer paints which take like days to cure (I'm use to instant dry acrylics). I assembled while paint was still curing on the insides. :oops: soooo. I can't guarantee all the pieces will work perfectly.
It was fun anyways.
Wow! Thanks for sharing ( and thanks for giving the link before I could)!
I'd love to se the "manuals" for making the different shapes!
I had to adjust the thickness though:
for Colorfabb XT I only printed 2 layers of 0.4 mm. three is waaaay too tough.
for glowfill also 2 layers, but remember to put material flow to about 133% (on normal settings, I do not remember what normal flow is in mm/s), so the sheets are flexible enough.
See above, XT is too tough when too thick. Also use pritt/glue! XT tends to not stick to the glass buildplate ( at least on UM2)
My settings are the first layer of 0.3mm, 2 layers of 0.15mm...
I also use an heated bed and kapton tape on my UM1, XT (transparent and colored) does indeed not attach well on glass without glue.

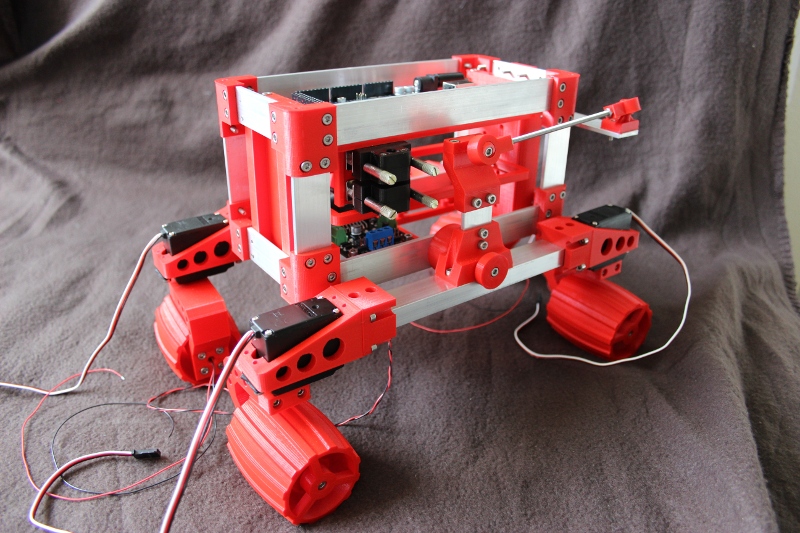
Hello there,
And counting. Here it is the integration within the structure. Now you can see the circuit boards and development being gradually.
At the level of the chassis.
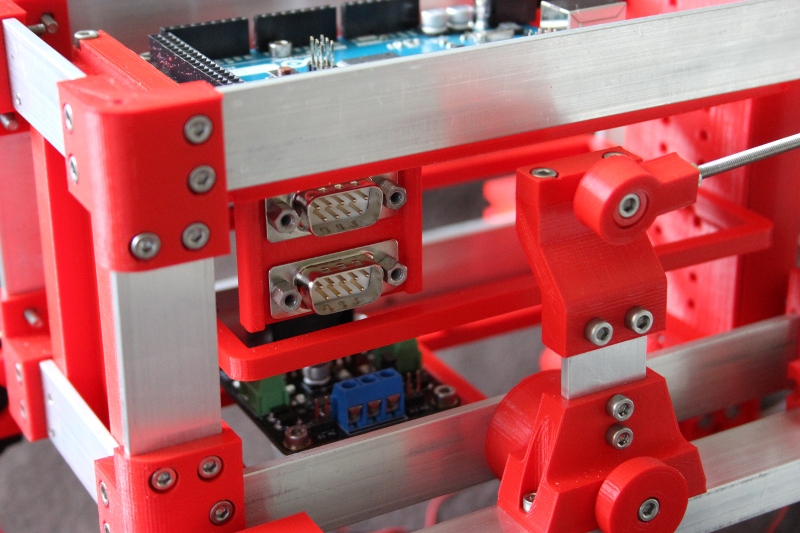
In terms of power outlets.
The rack removed.
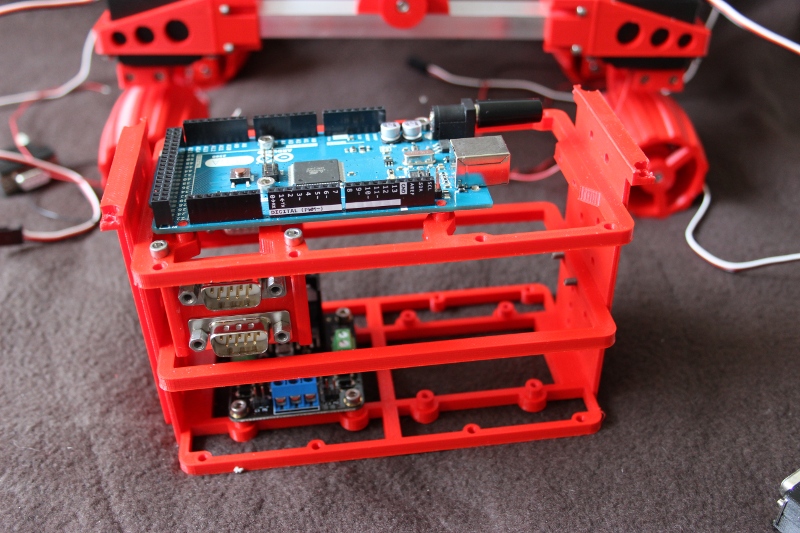
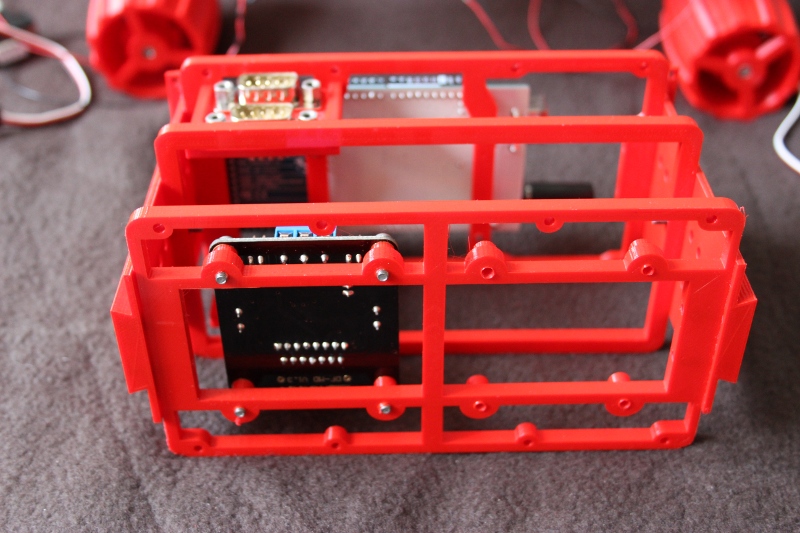
The bottom of the rack. Here I would lodge the battery over its entire length.
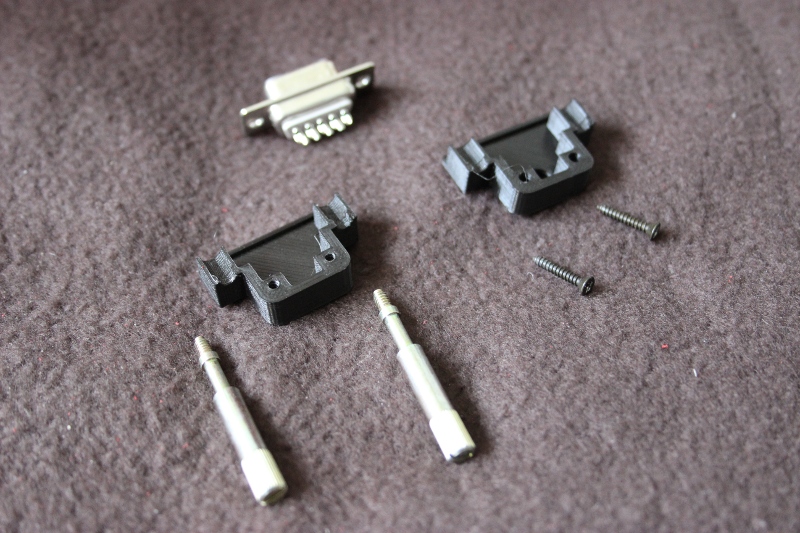
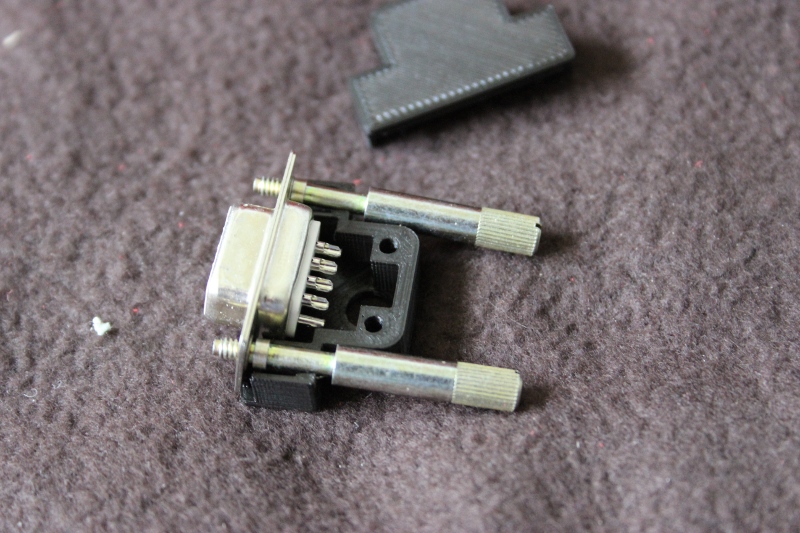
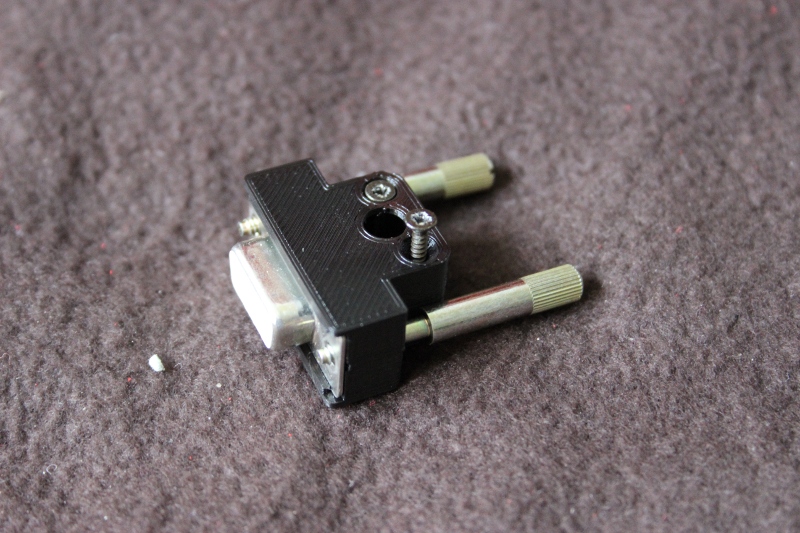
Installation of special covers on the D-sub 9 outlets.
Thank you for your attention and likes to touch me and pushes me to continue the project.
See you soon.
Not a very exciting print but it should come in handy. Modelled up and printed this thing yesterday to show people the difference in infill percentages.

I made the "inserts" removable because you just know people will break the things...


Cool idea and nice execution Robert


My first print with bronzeFill. It's just a small ring I designed for my girlfriend's upcoming fashion show, but boy that filament is awesome. There's absolutely no way you could tell it's printed.
Is that bronze fill ring straight from the printer? it looks slightly rounded, maybe tumbled?
Regardless it's an awesome finish!
Is that bronze fill ring straight from the printer? it looks slightly rounded, maybe tumbled?
Ah, sorry I put the info in the image description, forgot to do so in the post. It was printed at 0.1 layers, sanded lightly and then polished. Didn't take too much time. The rounding happened while sanding, it thought it would give a more realistic metal look.
Nice. Just did my first perfect print with bronzefill. No more holes, no more material flow at 120-130%. I just need to print fast (50mm/s at least).
Better put some laquer for rings and bracelet if you dont want to end up with a green finger after a few days.
Robert thats a nice print. Great idea too

I've finally finished the character. Paintjob took a little longer than expected  But it came out pretty much as I hoped. Hope it lived up to your expectations as well.


@Valcrow That's an awesome bike, I want to make one too now haha
Wow... Time to lock the thread, it's over.

Blimey! That's set the bar up into the stratosphere.
Very well done Alex.
*droops away*
See you all again in a couple years, when I'm done practicing.
DidierKlein 729
Awesome indeed great job :eek:
-
Our picks
-

Introducing the UltiMaker Factor 4
ArunC posted a topic in UltiMaker 3D printers,
We are happy to announce the next evolution in the UltiMaker 3D printer lineup: the UltiMaker Factor 4 industrial-grade 3D printer, designed to take manufacturing to new levels of efficiency and reliability. Factor 4 is an end-to-end 3D printing solution for light industrial applications-
-
- 3 replies
.thumb.jpeg.0b7a05eafc09add17b8338efde5852e9.jpeg)
Picked By
MariMakes, -
-

UltiMaker Cura 5.7 stable released
ArunC posted a topic in UltiMaker Cura,
Cura 5.7 is here and it brings a handy new workflow improvement when using Thingiverse and Cura together, as well as additional capabilities for Method series printers, and a powerful way of sharing print settings using new printer-agnostic project files! Read on to find out about all of these improvements and more.
-
-
- 26 replies
Picked By
MariMakes, -
-


.thumb.jpeg.0b7a05eafc09add17b8338efde5852e9.jpeg)

Recommended Posts
Top Posters In This Topic
362
282
221
179
Popular Days
Jan 5
30
May 12
26
Jan 13
23
May 1
22
Top Posters In This Topic
ian 362 posts
cloakfiend 282 posts
skint 221 posts
SandervG 179 posts
Popular Days
Jan 5 2014
30 posts
May 12 2014
26 posts
Jan 13 2014
23 posts
May 1 2014
22 posts
Popular Posts
kmanstudios
Took me forever to do this. And it is still rougher than I would have liked. 3D concept rendering: Finished piece:
kmanstudios
I just finished this. It was a multi-part print for ease of painting. Some of it I am not sure what happened...but hey, it is purty....And, I am unanimous in that ? Test Render Parts
gr5
Bath interferometers. I have made about 20 of these for people who use them to test their telescope mirrors. They are amazingly accurate and can do better than a $40,000 Zygo PSI optical tester. Th
Posted Images
valcrow 145
Sneak peak for my UM bros! Printed on the UMO.
More pics.
http://www.redicubricks.com/3d-printed-ducati-1199-superbike-on-the-ultimaker/
And yes, model is shared on Youmagine.
Link to post
Share on other sites