

I have bought the bronzefill...but done Nothing with it yet ;(

sorry for kidding :mrgreen:
I printed a small pyramide from bronzefill and tumbled it. I did not make and pics of this yet but worked pretty well. Bronzefill material was the reason for me to get the tumbler. In between the tumbler is running 24/7 but with other than printed parts. Good point, I have to go back to the rrots and doing more experiments with bronzefill
Saw at a shapeways tour they use a sort of vibration polisher for there plastics. Looking around i found this diy thing... looks like it might work...
I wanted to make a thumber and print most of the pieces but I clearly lack time and motivation... Mostly time
I added it to my long list of things i might make someday...
cheap chinese tumblers are runnin for bout 50 to 90 EUR on ebay. You can go much more expensive but for first trials these are good. Ok if DIY is the goal (what it should be :-P ) then you should start tinkering tonight...
I thought about buliding one by myself but then I ended up building a vibrating sieve for my father's backyard. And this thing is running like hell!
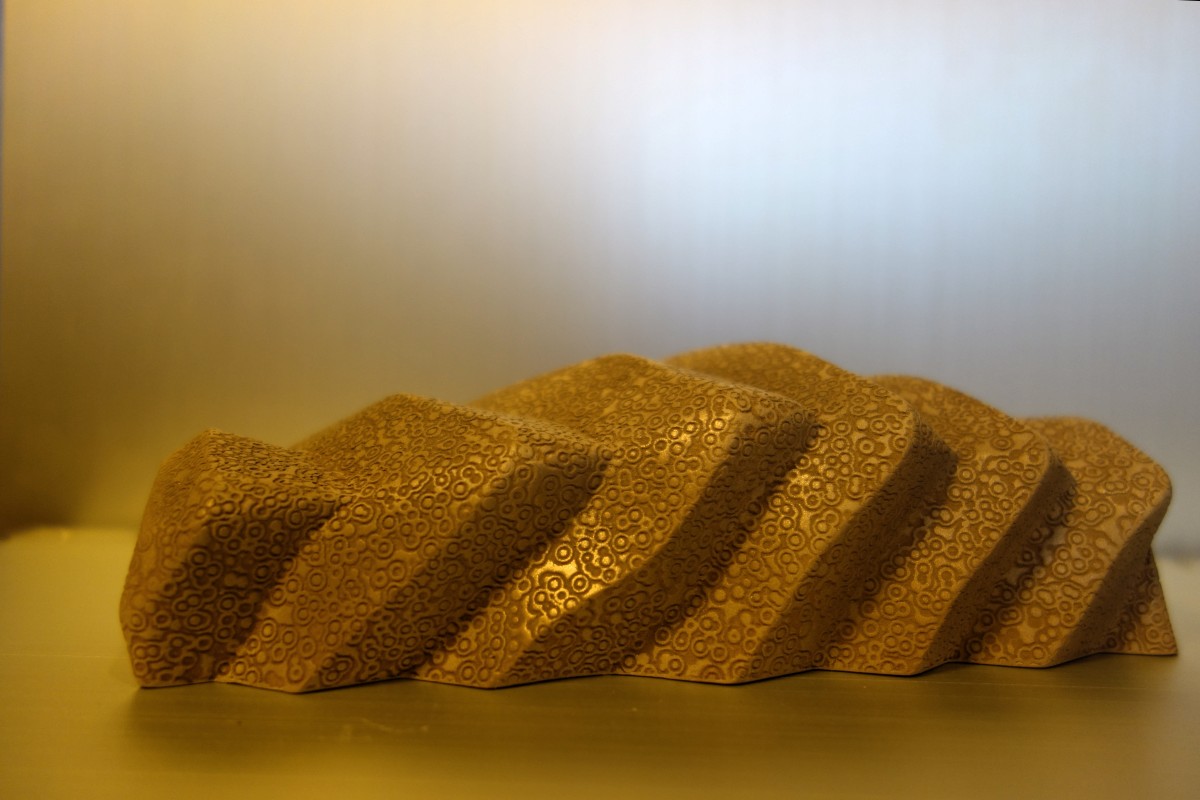
That looks great!! love the surface quality pattern weirdness. Can't tell the scale though... your mesh must've been pretty intense.
I have a vibratory tumbler and although it smooths it out a little bit it's not that great. I would recommend using a rotary tumbler vs a vibratory tumbler.
I've tried various medias as well plastic, wood, metal, volcanic ash none with day and night results
so those tumblers are about 50 euros when you buy them in a gun store.. (they don't require a permit in NL for accessoires). you use them to polish and clean the brass of shells, but they work great to polish any of your prints.
what do you use inside the tumbler?
At work I have a (goldsmith) tumbler with metal parts like balls,pins, satellites in all sizes. That mixed with water and a little soap. I put in a bronze fill print, there was a little difference, but not much. The water was brown afterwards.
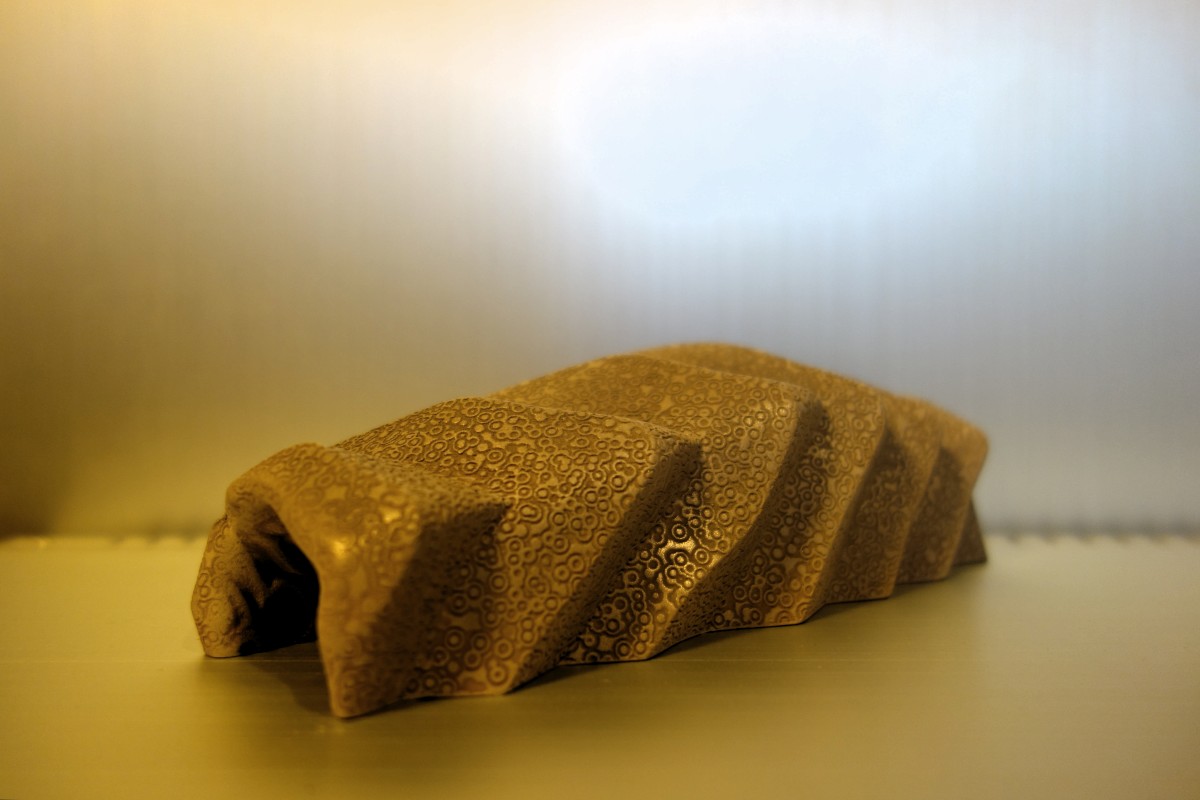
In the picture: right side is sanded and hand polished, left side is tumbled without sanding.

jep, can confirm that parts look similar after my tumbling experiments. I did no use steel stallites etc. but 6mm plasitc cones consistig of epoxy filled with some abrasive quartz. I have to to more tests. If possible it is worth to think about designing a part suitable for afterprint tumbling
Keep us posted(I want a thumbler  )
)
Check out this video. It shows two tumblers and some Dremel poslishing:
http://youtu.be/1ehmPlluYMY?list=UUmcEpxjd3LpxK6OiMQ4bWyA
yep I think this vid was the reason why I wanted a tumbler :-P
@Viralata That print looks great, love that pattern effect over the whole piece.
hi
i made this with a rock tumbler
http://bauermaker.tumblr.com/post/101928651812/bronzefill-after-rock-tumbler
and this with only the dremel
http://bauermaker.tumblr.com/post/91984082552/my-latest-work
i put some aluminium screws inside my tumbler. but they re quite big so i want to try something else in the future.
i also got very pleasing results just with sanding and polishing by hand, but have no pictures.
Did you play with the lighting or are the colors so very different?
Did you play with the lighting or are the colors so very different?
The silvery color of bauermakers first print is probably due to his choice of abrasive.
Usually when using Aluminium or Stainless steel it leaves a silver finish (when polishing like this you're not only taking away a small amount of material of the surface of your piece, but also slightly degrading your abrasive material, which leaves a residue on your piece.)
also, congrats on your 'leet' number of posts 
Sorry about the bad picture.
Done with the finish of the figure.
Now it's on to sculpting hair and base on top of the 3D printed base.

She's turned out great wallan!
Thanks for the YouTube video of the polishers. It looked like the stainless steel idea, while quieter, made for a lot of clean up to remove that black dust.
How would those work on regular PLA prints, I wonder?
I saw some sparrows in my back yard collecting some stuff for there nests the other day, So I decided to print them a wooden bird house. 


ArunC posted a topic in UltiMaker 3D printers,


.thumb.jpeg.0b7a05eafc09add17b8338efde5852e9.jpeg)

ArunC posted a topic in UltiMaker Cura,


Recommended Posts
Top Posters In This Topic
362
282
221
179
Popular Days
Jan 5
30
May 12
26
Jan 13
23
May 1
22
Top Posters In This Topic
ian 362 posts
cloakfiend 282 posts
skint 221 posts
SandervG 179 posts
Popular Days
Jan 5 2014
30 posts
May 12 2014
26 posts
Jan 13 2014
23 posts
May 1 2014
22 posts
Popular Posts
kmanstudios
Took me forever to do this. And it is still rougher than I would have liked. 3D concept rendering: Finished piece:
kmanstudios
I just finished this. It was a multi-part print for ease of painting. Some of it I am not sure what happened...but hey, it is purty....And, I am unanimous in that ? Test Render Parts
gr5
Bath interferometers. I have made about 20 of these for people who use them to test their telescope mirrors. They are amazingly accurate and can do better than a $40,000 Zygo PSI optical tester. Th
Posted Images
nudelmannrichter 14
yes, I tried. Throwing in worked quite easy. As result the part was in the tumbler.
Link to post
Share on other sites