

Those roses look familiar :-) they look great in that vase.
Working on a rose project for someone special myself, printing them slow, 5 hours for two.

Those roses look familiar :-) they look great in that vase.
Working on a rose project for someone special myself, printing them slow, 5 hours for two.
Blizz - thanks! 50mm/s - surprisingly good quality at that speed, as it seems. I printed once the stems with thorns without any supports and it turned out OK. Raft was used to keep them secured during the print. The blessings note was printed, too, wasn't it?
I've done another iteration of my cellphone wallet case. This is also my first prints with ABS!


Rule #1 when printing with ABS should be any printed upgrades you've made on the printhead with PLA will not live long. My fan duct melted, Then I was confused why I had to keep on leveling the bed. My printheat was melting! Now my new printhead is ABS but all cracked and held together with epoxy. My exhaust fan setup is too strong for ABS so I've had to move my printer into the bathroom so I can run it without the fan. Lastly Getting ABS to stick to the bed worried me in the beginning.
Printing this part in ABS wasn't easy but the results look great!
I'm now looking into injection molding for the next step.
Looks great! especially with maple syrup flavored Canadian plastic funny money. 
Surprised how well you got ABS to print on a UM1 despite the melting issues.
Canadian grade maple syrup is my secret additive in making it stick!

I find the warping and lifting at the corners can be controlled with lots of attached surface area to the bed and the goo. You can see cracking all around the base though. I’m going to try heating the build area more to hopefully fix that.
When printing the case compartment, I had to use lots of generated support material under it. But the corners still lifted because there wasn’t any solid foundation to stop them. Next time I’ll try adding thick legs into the model in the corners I remove later and hopefully they don’t crack in half mid print.
Since i am swamped with worked right now, I didnt have much time to do my usual sanding and priming so i gave Acetone Vapor smoothing a try.
It took away too much detail but still the smoothnes is amazing, and it only takes 15 minutes.

Getting the ABS to print smoothly was a bit more difficult but after a few failed attempts i found the perfect settings.
0.4 Nozzle
No Fan
250 first layer, 230 for the rest
70 degrees for the heated bed
30mms
115 % flow
printed in a very small room (Speiseklammer) without airflow using ABS Deluxe (less warping and consistent diameter)
I printed a clip in Flex Polyester 45D to build a custom violin microphone, printed on a Ultimaker 2 with 90C bed temperature and kapton tape wiped with acetone as printing surface.

https://www.youmagine.com/designs/diy-violin-microphone
So after almost 2 months of printing nothing. I just clicked on my ultimaker 2 last night and printed this amazing little monster character.
I was very impressed that after 2 months of nothing being used.. that the machine was able to be switched on and print something of this high quality without any preparation....
BRAVO !!! Ultimaker !!
Ian :smile:
www.ultimaker2.com
I just showed this to a good friend when I was in Dusseldorf and he couldnt stop laughing.. so guess who is getting a cool 3d printed surprise in the post this week !
I still love it when people handle ultimaker made models and just wonder... how the hell that was done.... MAGIC....
Ian
I really like the way this came out, so I'm sharing.
Printed on an Ultimaker Original at full build volume. 0.8mm nozzle. 0.2mm layer height. colorfabb woodfill filament.
Lighter color is as-printed. Darker is after stain with Red Mahogany wood stain.
Model is here: http://www.thingiverse.com/thing:438143


great print !!! a good reminder of how amazing the prints can come from a good old standard ultimaker 1
Ian
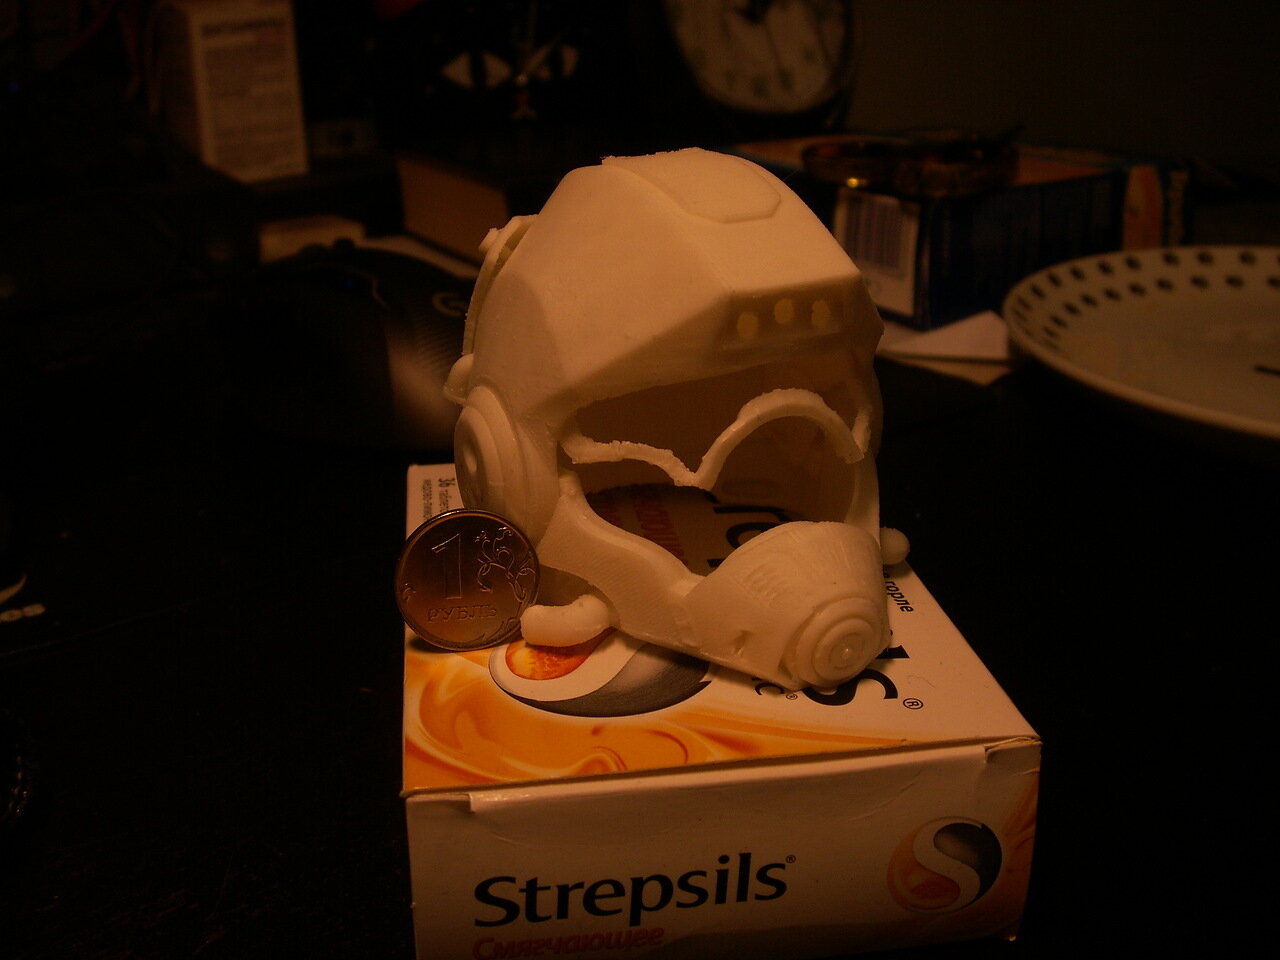
It got out dirtier than I thought it would be (maybe it is related to internal support column breaking off, dunno), but I also was surprised that these three parts actually working together, despite being printed at 1:2 size.
the splitter in the visor must have been a bloody nightmare to print and clean... would it not have been better to do it separately ?
Ian
I modeled and printed the logo from cinemassacre.com. My plan is to give this print to the owner of the site at the end of the week at a convention in Seattle. I will post making of time lapse videos next week sometime. Let me know what you guys think.


@printedsolid great print! It gave me the need to try woodfill again.
I noticed that bronzefill and woodfill dont like printing at slow speed at least for me. I have yet to finalize the test with bronze but with woodfill fine I cant print without clogging under 45 mm/s @0.2 layer height. Maybe if I print thicker layers I'll be able to slow down a bit but I'm happy that for the now I can do a print without having to unclog even once and waste a lot of time staring at the printer (not that I dont like to do that ).
So to validate I did a Ulti Robot and to celebrate did a 2X Ulti Robot that ended up being a Frankenstein with a scar around the skull 

Settings:
nozzle 0.4mm
0.2 layers
45mm/s
retraction off
travel speed 100mm/s
215C/60C with glue
I'm pretty sure I wont get any under extrusion at all at 50mm/s.
cool !!
Great stuff guys, am missing working with "my" 3D printer. :(

Look what I finally found in my UM2:

To be honest:
- It's not my design (Thingiverse 9084)
- I forgot support so it has a little beard
- the horn looks - uhhmm - very naturally grown...
But: Guess what software it was sliced with... :shock:
Yes:

(I felt free to download Cura Pink Unicorn from Github and to compile the PU-CuraEngine; but don't expect a finalized software, it's just a rough skeleton and a lot of features are still missing (but you get quite some bugs for free  ); The point is: Daid is doing a very great job and makes nice progresses but we all should remind ourselves that he is a software engineer and not a wizard :lol: ).
latest stuff


classic... stunning... beautiful !!
question is... do I mean your user photo ?... or your prints ! LOL
question is... do I mean your user photo ?... or your prints ! LOL
Ian you naughty dog
bit of both of course
You guys are nuts !
I just realized how many Canadians there are on here. Hi fellow Canucks! 
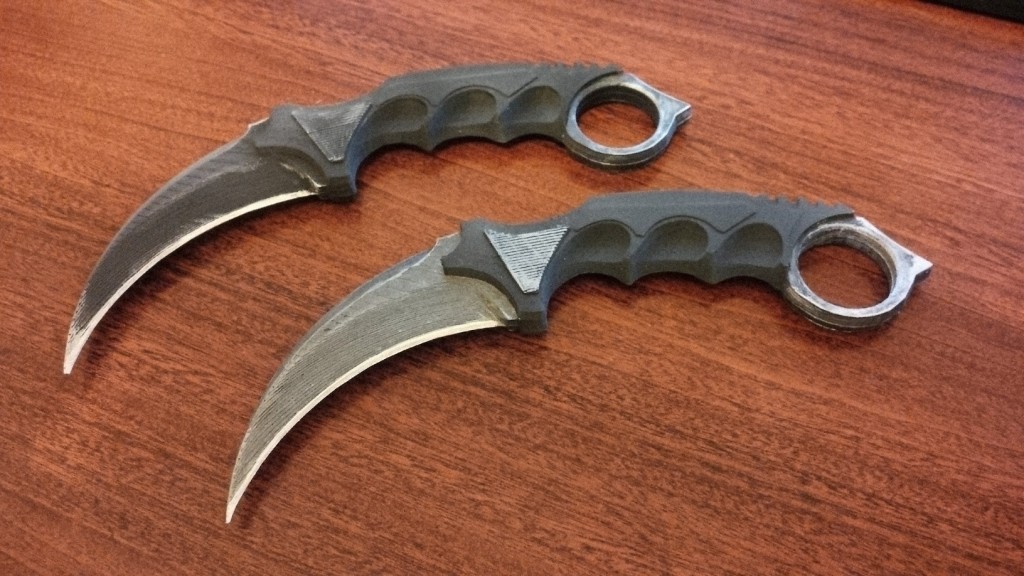
Haven't posted anything on here a while it seems :/ I didn't design this, but we needed a knife for a friend's film so I printed a couple on the day before the shoot and quickly sprayed it down with some paint. Should be good enough I hope!
Printed on UM2 with UM pearl (really nice natural colour)
The glass bed is really nice for halfing prints. I was never able to do this with the UM1 the seam would just be too large on blue tape.
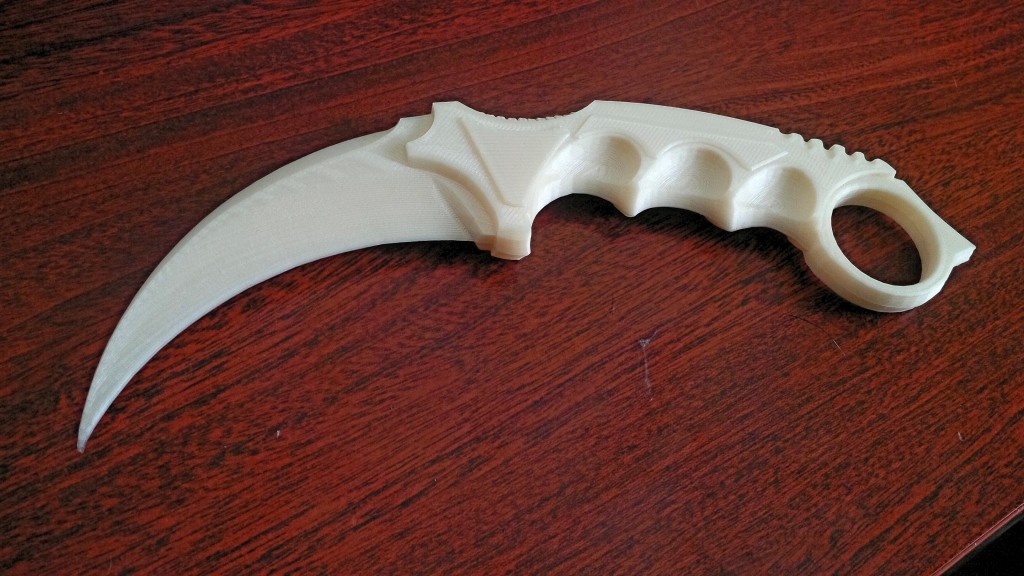
painted

ArunC posted a topic in UltiMaker 3D printers,


.thumb.jpeg.0b7a05eafc09add17b8338efde5852e9.jpeg)

ArunC posted a topic in UltiMaker Cura,


Recommended Posts
Top Posters In This Topic
362
282
221
179
Popular Days
Jan 5
30
May 12
26
Jan 13
23
May 1
22
Top Posters In This Topic
ian 362 posts
cloakfiend 282 posts
skint 221 posts
SandervG 179 posts
Popular Days
Jan 5 2014
30 posts
May 12 2014
26 posts
Jan 13 2014
23 posts
May 1 2014
22 posts
Popular Posts
kmanstudios
Took me forever to do this. And it is still rougher than I would have liked. 3D concept rendering: Finished piece:
kmanstudios
I just finished this. It was a multi-part print for ease of painting. Some of it I am not sure what happened...but hey, it is purty....And, I am unanimous in that ? Test Render Parts
gr5
Bath interferometers. I have made about 20 of these for people who use them to test their telescope mirrors. They are amazingly accurate and can do better than a $40,000 Zygo PSI optical tester. Th
Posted Images
Blizz 53
Thanks Titus.
Yeah it's the gearvase indeed. The couple in question spotted the vase on my 3d printed album on FB and expressed their love for it, hence the idea was born.
Link to post
Share on other sites